Children's Book Author

Movie Making

Lights, camera, action! Making a movie from start to finish is a challenging but rewarding activity for kids that flexes their artistic muscles while also promoting problem solving, teamwork and technology. Stretch the project over an entire week or write, shoot and edit all in one day. When your film is in the can, pop some popcorn and enjoy the final cut all together at your very own movie premiere.
Screenwriting and Storyboards
Good films start with a good script. Begin your movie making experience with screenwriting. Discuss with your filmmakers the different components that make good story and use some of their favorite movies as examples. Ask questions like:
-Where does the movie take place?
-Who is the main character?
-What does the main character want?
-What is standing in the way of the main character getting
what they want?
-Does the main character succeed?
Then brainstorm ideas for the movies they will write. Older kids can type out their own scripts; younger kids may want to dictate while a grown-up types. Between character dialogue, indicate where each section of the movie takes place by typing “INT” (interior) for indoor scenes and “EXT” (exterior) for outdoor scenes with a short description of the location. Here is an example:
INT: A child’s bedroom. All the lights are out except for a nightlight near the foot of the bed. A young boy wearing Star Wars pajamas snores loudly in bed.
Remember you will be filming this movie with locations you have available to you, so scenes that take place in a kitchen or backyard may be easier to film than a hospital or airplane. That said, if you have a kid who wants to write a movie that takes place in a space station and you want to build a space station – go for it!
Once you have a finished script, it’s time to storyboard. A storyboard is a visual outline of all of the shots in a film. If you think of a movie as a series of pictures, the storyboard represents each picture with a simple drawing. Storyboarding takes a bit of time but is a helpful planning step and will make shooting the film easier.
Start with a stack of white paper or posterboard and draw a series of blank boxes. Have your filmmakers read through their completed scripts and imagine how they see each scene on a screen. Is there a close up of the main character’s face? A shot of the character looking out a window? Draw individual pictures in each box that represent what the camera will capture. When you get to your shooting day, your filmmakers will refer back to their storyboard and use it as a map or guide to filming their scripts. (Fun observation – my 6-year-old is a big fan of graphic novels and particularly enjoyed creating the storyboards because they reminded him of the genre).


Shooting
Once you have your script and your storyboard, it’s time to shoot your movie. We had two filmmakers and two scripts, so we had two shooting days. Each child got to be the director for one entire day.
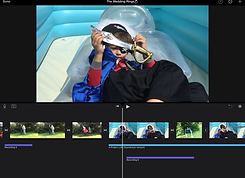
We shot our movies using iMovie and an iPad. iMovie is incredibly user
friendly and using an iPad made it easy to move between different
locations. There are many iMovie tutorials out there. We watched
this tutorial from Bit by Byte and learned all we needed to make
our movies. If you are shooting more than one movie, it is helpful if
possible to shoot on two separate iPads. This will allow your filmmakers
to edit their movies at the same time once shooting is finished.
Part of the exercise of being the director is leading a team. Encourage
your director to spend some time making a plan for the day, including
a list of which “actors” will be needed when. Our directors decided not to act in their own films and instead focused on filming and being in charge of the “set”. (Part of their goal was also to embarrass their parents – who comprised two thirds of the acting pool – as much as possible). Due to the limited size of our production team, directors were also in charge of all costume design and set dressing for their films. If you have a large family or make a movie with friends, others can take on these roles.
Encourage your directors to refer to their storyboards as they shoot their film, which will help keep them organized. Helpful tip – check off each box of the storyboard as you film it to make sure you don’t forget any shots. Shoot the movie in chronological order, or if a location appears more than once in the movie, consider organizing your shooting schedule by location (e.g. shoot all the scenes that take place in the kitchen before moving to another spot).
We found it helpful to have a small rehearsal before shooting each scene. To keep things fun and feeling authentic, on their designated day as director, our filmmakers got to wear a special Director's hat and give important orders (Quiet on the set!) with a mini megaphone.


Editing
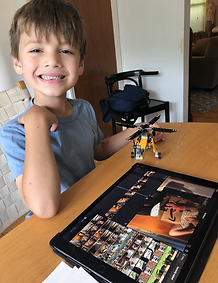
Editing is where younger filmmakers may need some help. My 9-year-old director edited her movie completely on her own. My 6-year-old conceived of and filmed all the shots in his movie (again, I think the graphic novels really helped here) but did need some help piecing
it together, particularly laying in the music. Especially if your kids have
done any remote learning lately, they are probably more adept at this
sort of thing than you realize. So encouraging independence is
completely feasible here.
Remember your movies can be as simple or sophisticated as you want.
Older, more tech savvy kids will love layering intricate visual and sound
effects into their films. Younger kids may want to skip extra effects all together. Do what works for you. If you can manage it though, try to add opening and closing credits. iMovie has multiple template choices to aid in this process and your filmmakers will feel great pride seeing their name on the screen when you watch the finished product.

Movie Premiere
Many of these at-home activities are about finding little ways to make the experience feel special. What more special way to end a filmmaking project than with a movie premiere? Get dressed up, arrange chairs in front of your television and pop up some popcorn to recreate a
theater environment. Invite family or friends if circumstances allow or have
them join in from afar with zoom or FaceTime.
If you want to go all out, lay down a red carpet and walk-of-fame style
stars so your filmmakers can strut their stuff for the paparazzi before the
movie begins.
A movie premiere works best if you are able to view your movies on a
larger screen, either by exporting your iMovie files or doing a screen
share between your iPad and television. If you have to watch the movie
on an iPad or computer, that’s fine too – what counts is that you all enjoy the films together and applaud the hard work and accomplishments of your young filmmakers. Bravo!