Children's Book Author
Science Activities
There are so many science activities to do at home with kids. Below find a mix of quick and simple experiments, and more substantial projects that take longer to execute. Bonus for any time kids can work independently.

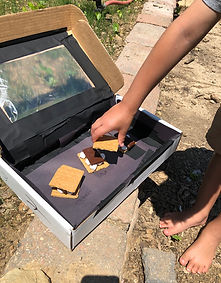
Solar Oven
Who doesn't love a science experiment that ends with eating s'mores?
For this project you will need:
-Cardboard box with lid
-Plastic Wrap
-Foil
-Black paper
-Wooden skewer or stick
-Scissors and tape
Older kids should be able to follow these step-by-step directions on Camping World mostly on their own, but may need help lining the box.
Tips and Reflections:
-Pick a sunny day
-Wait until the very end to add the chocolate and monitor it closely - it only takes a few seconds to melt.


Egg Drop
Remember doing this as a kid? The objective is to build a contraption
that will prevent a raw egg from breaking when dropped from a significant
height onto a hard surface.
For this project you'll need:
-Raw eggs
-A bunch of materials. You can use just about anything from recycled
cardboard to cereal. (I remember a classmate of mine in second grade
who placed her egg in the middle of JELL-O).
Suggestions:
-Plastic straws, tissue paper, paper cups, toilet paper rolls, cotton balls, paper Easter grass, bubble wrap and lots and lots of tape
Tips and Reflections:
-Talk through some basic ideas in advance such as insulation and how a parachute works, but then stay out of their way. Part of the fun is letting them figure it out on their own.
-Use hard boiled eggs for practice and planning.
-You'll need a hard surface from which to drop the eggs. A deck is ideal, but standing on a table in an apartment works as well.
-Add a challenge of receiving bonus points if you can see the egg in its contraption.


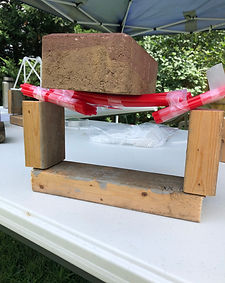
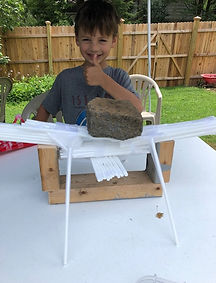
Straw Bridge Building
This is a great project for kids of all ages. The challenge is to construct
the strongest bridge possible using only plastic straws and tape. The
bridge must be freestanding and span 10" on a wooden base.
For this project you will need:
-Wooden base (more below)
-Plastic straws
-Scissors and tape
-Small weights, such as coins, marbles, rocks or metal washers
Watch this video by TeachEngineering for step-by-step directions and helpful visuals.
Tips and Reflections:
-You can either build your own wooden base per the video or simply place two wooden unit blocks 10" apart.
-Before you start constructing, discuss different types of bridges and what makes them strong. This great video by SciShow Kids is a perfect way to start.
-Straws may be taped together in any fashion but may not be taped to the wooden base.
-Some bridge designs are surprisingly strong and you may have to move onto heavier weights - even bricks!


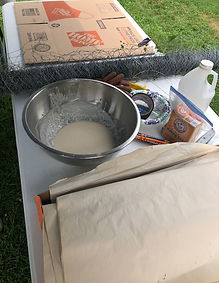
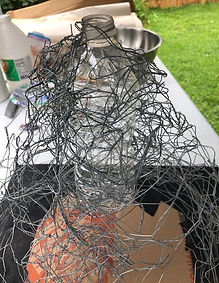
Chicken Wire Volcano
A timeless project that culminates in the surefire baking soda and
vinegar combo.
For this project you will need:
-Large piece of cardboard
-Scissors or wire cutters
-Chicken wire
-Plastic bottle or small cup
-Flour and water
-Newspaper
-Acrylic paint
-Baking soda and vinegar
-Funnel
This eHow article does a nice job of outlining all the steps.
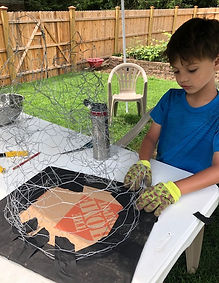
Tips and Reflections:
-This is a fun project but requires a combination of skill, patience and willingness to cover yourself in sticky stuff that can make it difficult for kids to do independently so be prepared to help.
-We covered our cardboard base with black tape for a clean look. You could also paint the base at the end.
-Gloves are helpful when working with chicken wire.
-Don't forget it takes awhile for the paper mache to dry so you'll have to wait before getting to the best parts - the painting and the lava explosion.


Homemade Sun Dial
A simple project dating back to ancient days. Use natural materials to
tell the time and observe the rotation of the earth.
For this project you will need:
-A stick, stake or wooden dowel
-A handful of large rocks
Find a sunny spot outside to make your sundial. Place the stake directly
in the ground, or if you are working on a hard surface, position the stake
in playdough or clay to keep it upright. At noon, place a rock exactly in
the middle of the stake's shadow. Do this on the hour, every hour, until
the sun sets and then continue again on the other side the next morning.
Tips and Reflections:
-We were surprised that as the afternoon progressed the distance between the rocks was not consistent.
-For a scaled down version, a pencil stuck in the middle of a paper plate also makes a great sundial.
-Use the sundial to guess the actual time throughout the week.
-As an added touch, write or paint the hour numbers on the rocks.

Leakproof Bag
A fun experiment that doubles as a magic trick.
For this project you will need:
-Plastic bag filled half way with water
-Handful of sharp pencils
Steve Spanger Science nicely outlines not only how to do this quick
and easy experiment but also why it works (hint - it's all about polymer
Tips and Reflections:
-Activities like this one only take minutes to complete but are great to mix in between longer projects.

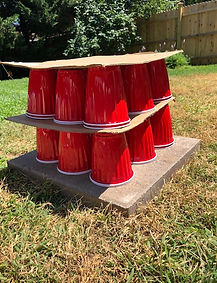
Can a Paper Cup Support Your Weight?
STEM challenge about weight distribution.
For this project you will need:
-Paper or plastic cups
-Cardboard
This activity comes from Science Sparks and challenges kids to
engineer a method of standing on paper cups without crushing them.
Tips and Reflections:
-Have the cardboard visible and available but let your kids figure out how to use it to make the cups support more weight.
-Have a parent or adult take a turn and see if the cups still remain intact.


Baking Soda Powered Boat
Use the baking soda and vinegar left over from your volcano to power
simple water bottle boats.
For this project you will need:
-Plastic water bottle
-Drinking straw
-Hot glue gun
-Scissors
-Baking soda and vinegar
-A baby pool, large bucket or bathtub filled with water
KiwiCo Corner provides clear instructions for assembling and racing
the boats.
Tips and Reflections:
-Stretch out this activity by decorating the boats before putting them in
the water.
-Even after increasing the amount of baking soda and vinegar, the boats
were slower than we we expected, though we still had fun.


Inverted Balloon
An easy but impressive experiment about air pressure.
For this project you will need:
-Glass bottle
-Balloon
-Boiling water
Follow these simple steps at A Dab of Glue Will Do and watch in
awe as a balloon is pulled into a glass bottle and expands on its own.
Tips and Reflections:
-Our glass bottle was on the large side (it was actually a jug). Though
the experiment still worked, it took several hours for the balloon to invert and a glass milk or soda bottle would be preferable. Still, we enjoyed coming back to the project throughout the day and seeing the balloon's progress.

Kinetic Sand
Not an experiment, but still science-related and a real crowd pleaser.
If you are doing multiple science activities in the same day, set up a
table where the kids can play with the sand between experiments
or during downtime.
Find it here.